
Table of Contents
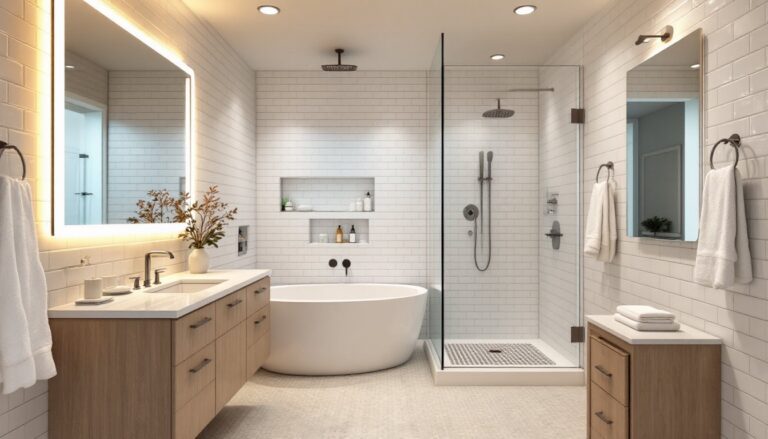
ToggleSmall bathrooms don’t have to feel cramped. With the right strategies, a compact 5×8 or 4×6 space can look bigger, function better, and feel just as polished as any luxury bath. The key isn’t ripping out walls, it’s making smart choices about fixtures, storage, lighting, and layout. This guide walks through seven practical remodel ideas that work in real bathrooms, from mounting vanities to choosing the right finishes. Whether you’re prepping for a full gut renovation or tackling incremental updates, these solutions deliver maximum impact without the maximum headache.
Key Takeaways
- Wall-mounted fixtures and floating vanities instantly expand perceived space by clearing floor area and creating visual depth through shadow lines.
- Vertical storage solutions like recessed shelving, over-toilet organizers, and corner units maximize dead zones without consuming floor footprint in tiny bathroom remodel projects.
- Light colors combined with layered lighting design (recessed cans, vanity task lights, and dimmers) make small bathrooms feel larger and more functional.
- Frameless glass shower enclosures keep sight lines open and extend perceived depth compared to solid curtains or opaque barriers.
- Budget-friendly DIY updates like fresh paint, new hardware, tile accents, and caulking deliver 80% of remodel impact for just 20% of contractor costs.
- Plan meticulously before purchasing fixtures—measure twice, mock up positions with tape, and confirm water and electrical runs with a licensed plumber to avoid costly mistakes.
Wall-Mounted Fixtures and Floating Vanities
A traditional vanity sitting on the floor eats visual real estate and makes cleaning underneath impossible. Wall-mounted fixtures, sinks, toilets, and vanities, change that instantly. By clearing floor space, they trick the eye into seeing more room while simplifying cleanup.
Floating vanities come in widths from 24″ to 48″ (actual interior cavity depth is typically 12-15″). Mount them 30-36″ off the floor for standard comfort: this leaves breathing room underneath and creates shadow line that emphasizes depth. Consider single-bowl sinks (18-24″ wide) over double bowls in tight quarters, you won’t miss the second basin as much as you’d regret cramped legroom.
Wall-mounted faucets pair perfectly with floating vanities. They free up countertop edge and let you extend the counter toward corners without obstruction. For wall-mounted toilets, ensure your wall has solid framing or install a carrier plate (an in-wall tank system). This costs more upfront but saves 7-9″ of floor space compared to a floor-mount.
Beware: floating fixtures require solid lumber backing (typically 2×10 studs or blocking) behind drywall. If you’re tiling, plan the tile layout first, you don’t want seams hitting fixture mounting points. Hire a licensed plumber if you’re rerouting water lines: DIY rough-in mistakes get expensive fast.
Vertical Storage Solutions and Shelving
Vertical is your best friend in a small bath. Instead of fighting for countertop or under-sink cabinet space, stack upward. Open shelving, recessed shelves, and corner units maximize dead zones without taking up floor footprint.
Recessed shelving sits flush in the wall cavity and looks built-in. If studs run 16″ on center, you can often fit a 24″ wide recessed unit between studs with 2×4 framing. Depth is typically 3.5-4″. They cost $60-150 to install DIY (if you’ve got framing confidence) but deliver pro results. For renters or when you can’t modify walls, adhesive corner shelves ($15-40) work surprisingly well for lightweight items.
Over-the-toilet organizers are the unsung heroes of small baths. A sturdy model (rated for 50+ lbs) sits above the tank and stores towels, baskets, and bottles without eating floor space. Pair it with matching pull-out drawer organizers under the sink to segment shampoo, cleaners, and tools. Custom drawer inserts run $20-60 but prevent the chaos of a junk drawer.
Keep shelves uncluttered: use matching bottles and baskets so visual chaos doesn’t make the space feel smaller. Group items by category (hair care, towels, cleaning supplies) rather than random placement. Floating shelves support roughly 25-50 lbs per shelf depending on wall anchors: don’t overload.
Light Colors and Strategic Lighting Design
Color palette impacts perceived space more than square footage. White, soft gray, pale blue, and warm beige reflect light and open up walls. Avoid dark accent walls in tiny baths, they recede visually and shrink the room further.
Wall paint: Use semi-gloss or satin finishes in bathrooms (not flat). They’re moisture-resistant and reflect ambient light. For 80-100 sq ft (typical small bath), one gallon covers two coats. Kilz, Sherwin-Williams, and Benjamin Moore all make solid bath-specific primers and topcoats: primer matters because humidity and moisture bleed-through ruin flat finishes.
Lighting design is where small baths either shine or disappoint. Avoid a single overhead fixture: instead layer: recessed can lights (4-6″ diameter, spaced 4-6 feet apart), vanity task lighting, and ambient accent lighting. Install can lights on a dimmer, full brightness for grooming, softer levels for ambiance. LED bulbs (9-12W equivalents of 60W incandescent) cut energy use and heat, important in cramped spaces.
Vanity lighting should flank the mirror (not above it) to minimize shadows. Two 24-28″ sconces at eye level beat a single overhead bar. If space is truly tight, a mirror with integrated LED backlight ($80-200) provides both function and a subtle glow that makes walls feel farther away. For a rental-friendly option, lean mirrors do the job too, less permanent and surprisingly stable if you anchor them properly.
Glass Shower Enclosures and Open Layouts
A solid shower curtain or opaque enclosure visually cuts a small bath in half. Frameless glass enclosures or sliding glass doors keep sight lines open and make the entire space feel contiguous.
Frameless glass costs more ($800-1,500 installed vs. $150-400 for a basic framed unit), but the payoff is real: you see straight through to the opposite wall, extending perceived depth. Tempered glass (required by code) is safe and easier to clean than a patterned curtain. If budget is tight, a semi-framless door ($400-800) splits the difference, aluminum rails on top and bottom, glass panels with minimal framing.
Shower pan size matters. A 32×36″ corner shower fits tight spaces and meets most codes: this is the finished size, so your rough framing must be larger. If you can squeeze 36×48″, do it, a standard alcove that doesn’t feel claustrophobic. For wet areas, use cement backer board (not drywall) and ensure a 2% slope toward the drain. Tile over the backer board: don’t skimp on waterproofing.
Wet bath layouts (where the shower and rest of the bathroom share the same space without a full barrier) work in 4×6 baths. The entire floor slopes toward a floor drain, so showers happen wall-to-wall. European hotels do this constantly. It requires perfect drainage planning and a licensed plumber, but saves 10-15 sq ft of real estate inside a shoebox bathroom.
Multi-Functional Fixtures and Smart Features
Modern fixtures do double (or triple) duty. Combination sink-and-toilet units exist but feel gimmicky: skip them. Instead, focus on genuine multi-function: a vanity mirror with storage, a towel rack that also mounts shelves, or a medicine cabinet with defogging and LED lighting.
Smart ventilation fans with humidity sensors ($80-150) turn on and off automatically, preventing mold and mildew without user intervention. Hard-wired units beat plug-in options in small spaces, cleaner, quieter, no trailing cords.
Compact toilets and wall-mounted bidets save inches. A standard toilet seat height is 15-17″: elongated bowls (21″ length) vs. round (18″ length) steal 3″. In a tight powder room, round and a bidet seat ($200-600) occupy less real estate than two people fussing over a single fixture. Bidet attachments are DIY-friendly if you don’t mind basic plumbing skills: look for adjustable water pressure since high-powered spray in 50 sq ft echoes like a jet engine.
Recessed medicine cabinets ($40-120) mount flush in the wall, eliminating the bump-out of a surface-mounted cabinet. Pair one with a lighted mirror to avoid a cluttered counter. If you’re adding smart features, ensure GFCI outlets (ground-fault circuit interrupter) protect any electrical devices within 6 feet of water, code requirement in bathrooms.
Budget-Friendly DIY Updates
Not every improvement requires a contractor. Many updates deliver 80% of the impact for 20% of the cost if you do the work yourself.
Paint and hardware: A fresh coat of semi-gloss paint ($30-50), new cabinet hardware ($2-8 per knob, 10-15 knobs typical), and updated mirror ($50-150) transform the space for under $250. New caulk around the tub and sink ($5-10, plus time) prevents water damage and looks intentional. Use painter’s caulk for trim, silicone caulk for wet areas: don’t mix them.
Tile accents: If you can’t afford a full tile remodel, a subway tile or mosaic backsplash behind the sink ($40-80 in materials, 6-10 hours labor) gives a curated look. Tile adhesive, grout, and basic tools (notched trowel, grout float, sponge) run $30-50. Avoid perfection: slight grout variations read as handmade, not amateurish.
Lighting upgrades: Swapping a basic vanity fixture for a brushed nickel LED unit ($40-80) instantly modernizes the look. This is a 30-minute DIY job if you’re comfortable turning off breakers and disconnecting wires. Follow the wire colors (black to black, white to white, ground to ground) and use a voltage tester to confirm power is off.
Shelving and storage: Adhesive-backed shelves and wall organizers ($30-80) require no drilling, so rental-friendly. Read weight limits carefully, most support 10-20 lbs per shelf, enough for rolled towels and light baskets.
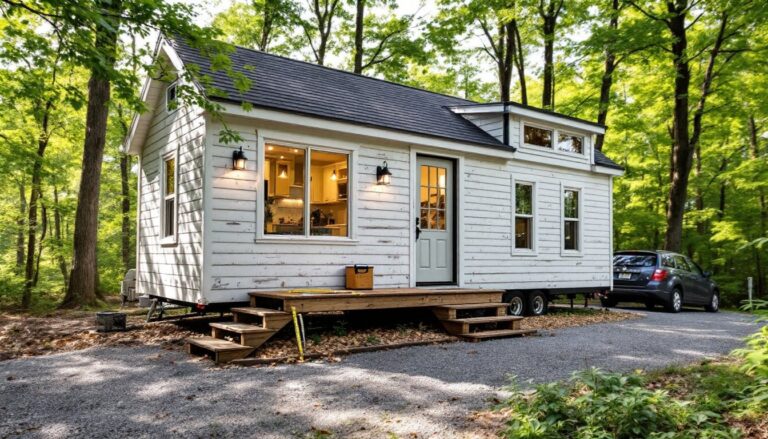
Tiny Homes Tips: Essential can transform a cramped 400-square-foot space into a comfortable, functional dwelling, and the same mindset applies to bathrooms. Home Renovation Ideas Examples show real-world transformations from homeowners who’ve tackled these exact projects. If you want full inspiration, home decorating and interior design resources show visual examples of small baths done right. Drywall patching ($10-20 for compound, mesh tape, and a putty knife) fixes holes, then primer and paint ($30-50 total) make it vanish. These micro-projects add up to a refreshed space without renovation debt.
Conclusion
A small bathroom remodel doesn’t mean choosing between function and style. Wall-mounted fixtures, vertical storage, smart lighting, and open layouts create perception of space while smart materials and multi-functional products earn their keep. Start with paint and hardware, low risk, high reward. Layer in structural changes (floating vanity, recessed shelving) once you’ve committed to the layout. Most importantly: plan before you buy. Measure twice, mock up fixture positions with tape, and confirm water/electrical runs with a licensed plumber. Small spaces punish poor planning, but reward thoughtful execution.